Hyundai Palisade: Cooling System / Coolant
Repair procedures
| Replacement And Air Bleeding |
| • |
Be careful not to damage the parts located under the vehicle
(floor under cover, fuel filter, fuel tank and canister) when
raising the vehicle using the lift.
(Refer to General Information - "Lift and Support Points")
|
|
| • |
Never remove the radiator cap when the engine is hot. Serious
scalding could be caused by hot fluid under high pressure escaping
from the radiator.
|
|
| • |
When pouring engine coolant, shut the relay box lid and be careful
not to spill coolant on the electrical parts or the paint. Rinse
off any spilt coolant immediately.
|
|
| 1. |
Make sure the engine and radiator are cool to the touch.
|
| 2. |
Remove the radiator cap (A).

|
| 3. |
Remove the engine room under cover.
(Refer to Engine and Transaxle Assembly - "Engine Room Under Cover")
|
| 4. |
Loosen the drain plug (A), and drain the coolant.

|
| 5. |
Tighten the radiator drain plug securely.
|
| 6. |
Remove, drain and reinstall the reservoir. Fill the tank halfway to
the MAX mark with water, then up to the MAX mark with antifreeze.
|
| 7. |
Fill the radiator with water through the radiator cap and tighten the
cap.
| •
|
To most effectively bleed air, pour water slowly while
pressing on the upper / lower radiator hoses..
|
|
|
| 8. |
Start the engine and allow it to warm up to normal operating temperature.
Wait until the cooling fans turn on 2-3 times. Accelerate the engine
to aid in purging trapped air. Shut the engine off.
|
| 9. |
Wait until the engine is cool.
|
| 10. |
Repeat steps 1 to 8 until the drained water runs clear.
|
| 11. |
Fill with fluid mixture of coolant and water (45-60% or 45-50% in North
America, Europe and China) slowly through the radiator cap.
Push the upper/lower hoses of the radiator so as to bleed air easily.
| •
|
Use only the specified antifreeze/coolant.
|
| •
|
For best corrosion protection, the coolant concentration
must be maintained year-round at 45 - 60% minimum.
Coolant concentrations less than 45 - 60% may not provide
sufficient protection against corrosion or freezing.
|
| •
|
Coolant concentrations greater than 60% will impair
cooling efficiency and are not recommended.
|
|
| •
|
Do not mix different brands of antifreeze/coolants.
|
| •
|
Do not use additional rust inhibitors or antirust products;
they may not be compatible with the coolant.
|
|
|
| 12. |
Start the engine and run until coolant circulates.
|
| 13. |
When the cooling fan operates and coolant circulates, refill coolant
through the radiator cap.
|
| 14. |
Repeat step 11 until the cooling fan operates 3-5 times to sufficiently
bleed air out of the cooling system.
|
| 15. |
Install the radiator cap and fill the reservoir tank to the "MAX" (or
"F") line with coolant.
|
| 16. |
Run the vehicle under idle until the cooling fan operates 2-3 times.
|
| 17. |
Stop the engine and wait for the coolant to cool down.
|
| 18. |
Repeat steps 10 to 15 until the coolant level doesn't fall anymore to
bleed air out of the cooling system.
| •
|
Bleed air out of the cooling system and refill coolant
after the coolant has cooled down completely. To do
this, recheck the coolant level in the reservoir tank
2-3 days after replacing coolant.
|
|
|
Coolant capacity :
Approx. 11.98 L (3.16 U.S.gal., 12.66 U.S.qt., 10.54 lmp.qt.)
|
|
Engine Overheat Troubleshooting
Inspection
Remedy
Visual inspection
Inspect for shortage of coolant in reservoir tank ...
Other information:
Hands-off warning
Keep hands on steering wheel
If the driver takes their hands off the
steering wheel for several seconds
while the HDA system is activated,
the system will warn the driver.
Information
If the steering wheel is held with a
light grip, the message may appear
because the HDA system may not recognize
that the driver has their hands
on the steering wheel...
Troubleshooting
Symptom
Probable cause
Remedy
Play in steering
Loose yoke plug
Retighten
Loose steering gear mounting bolts
Retighten
Loose or worn tie rod end
Retighten or replace as necessary
Steering wheel operation is not smooth (Insufficient power assist)
V-belt slippage
Readjust
Damaged V-belt
Replace
Low fluid level
Replenish
Air in the fluid
Bleed air
Twisted or damaged hoses
Correct the routing or replace
Insufficient oil pump pressure
Repair or replace the oil pump
Sticky flow control valve
Replace
Excessive internal oil pump leakage
Replace the damaged parts
Excessive oil leaks from rack and pinion in gear box
Replace the damaged parts
Distorted or damaged gear box or valve body seals
Replace
Steering wheel does not return properly
Excessive turning resistance of tie rod end
Replace
Yoke plug excessively tight
Adjust
Tie rod and/or ball joint cannot turn smoothly
Replace
Loose mounting of gear box mounting bracket Worn steering shaft joint and/or
Retighten
Worn steering shaft joint and / or body grommet
Correct or replace
Distorted rack
Replace
Damaged pinion bearing
Replace
Twisted or damaged hoses
Reposition or replace
Damaged oil pressure control valve
Replace
Damaged oil pump input shaft bearing
Replace
Noise
Hissing Noise in Steering Gear
There is some noise with all power steering systems...
Categories
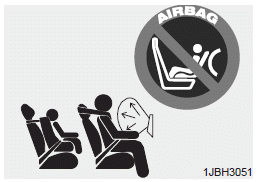
Even though your vehicle is equipped
with the OCS, never install a child
restraint in the front passenger's seat.
An inflating air bag can forcefully
strike a child or child restraint resulting
in serious or fatal injury.
read more


 Troubleshooting
 Cooling Fan