Hyundai Palisade: Integrated Body Control Unit (IBU) / IMS Control Switch
Hyundai Palisade (LX2) 2020-2025 Service Manual / Body Electrical System / Integrated Body Control Unit (IBU) / IMS Control Switch
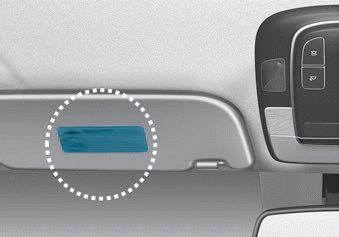
Components and components location
| Components |

Repair procedures
| Inspection |
| 1. |
Disconnect the IMS control switch connector.
|

| 2. |
With the power IMS control switch in each position, make sure that continuity
exists between the terminals below. If continuity is not as specified,
replace the IMS control switch.
|

| Removal |
| 1. |
Disconnect the negative (-) battery terminal.
|
| 2. |
Remove the front door trim.
(Refer to Body - "Front Door Trim")
|
| 3. |
Disconnect the IMS switch connector (A) and then remove the IMS switch
(A).
|

| Installation |
|

| 1. |
Connect the connectors and reassemble the IMS control switch.
|
| 2. |
Reassemble the front door trim.
|
| 3. |
Connect the negative (-) battery terminal.
|
 IMS (Integrated Memory System) module
Components and components location
Components
IMS input/output pin information
No
Connector A
Connector B
Connector C
1
Cushion extension moter (Front)
B+ (Power)
Seat slide motor switch (Front)
2
Seat recline motor (Front)
Ground (Power)
Seat recline switch (Front)
3
Seat height motor (Up)
B+ (Power)
Seat tilt switch (Up)
4
Seat slide motor(Front)
-
Seat height switch (Up)
5
Seat Cushion extension moter (Rear)
Ground
Seat cushion extension switch (Front)
6
Seat recline motor (Rear)
B_CAN (High)
7
Seat tilt motor (Up)
B_CAN (Low)
8
Seat tilt motor (Down)
Lumber motor (Up)
9
Seat height motor (Down)
Lumber motor (Down)
10
Seat slide motor (Rear)
Seat slide sensor
11
Seat tilt sensor
12
-
13
Seat position sensor power
14
IGN 1
15
Seat slide switch (Rear)
16
Seat recline switch (Rear)
17
Seat tilt switch (Down)
18
Seat height switch (Down)
19
Seat cushion extension switch (Rear)
20
Ground
21
Lumber motor (Low)
22
IMS switch 2
23
-
24
Seat recline sensor
25
Seat height sensor
26
-
27
-
28
Battery (+)
Repair procedures
Removal
1...

Other information:
Hyundai Palisade (LX2) 2020-2025 Owner's Manual: Explanation of scheduled maintenance items
Engine Oil and Filter The engine oil and filter should be changed at the intervals specified in the maintenance schedule. If the vehicle is being driven in severe conditions, more frequent oil and filter changes are required. Drive Belts Inspect all drive belts for evidence of cuts, cracks, excessive wear or oil saturation and replace if necessary...
Hyundai Palisade (LX2) 2020-2025 Owner's Manual: LCD display message
Transmission hot! Park with engine On Under certain conditions, such as repeated stop-and-go launches on steep grades, sudden take off or acceleration, or other harsh driving conditions (mud or sand road), the transmission temperatures will increase excessively...
Categories
- Manuals Home
- 1st Generation Palisade Owners Manual
- 1st Generation Palisade Service Manual
- Electronic Child Safety Lock System
- Wireless Cellular Phone Charging System
- Rear center seatbelt (3rd row)
- New on site
- Most important about car
Air Bag Warning Labels
Air bag warning labels, required by the U.S. National Highway Traffic Safety Administration (NHTSA), are attached to alert the driver and passengers of potential risks of the air bag system. Be sure to read all of the information about the air bags that are installed on your vehicle in this Owners Manual.

Copyright © 2025 www.hpalisadelx.com