Hyundai Palisade: Coupling Assembly / Pressure Sensor
Description and operation
The AWD ECU makes a Motor Pump(Actuator) turn round for generating an oil pressure.
And then it presses a multiple disk clutch and transfers the generated torque
into rear wheels. Its torque value varies according to a pressure status.
| • |
Component location

|
Schematic diagrams

Repair procedures
| Measure the resistance of pressure
sensor |
| 1. |
Turn ignition switch OFF.
|
| 2. |
Disconnect the pressure sensor connector.
|
| 3. |
Measure resistance between sensor terminal and terminal.
|
| 4. |
Check the measured resistance. (Refer to table)
|
[Table 1]
Terminal
|
Resistance
|
PIN 2 – PIN 3
|
153.2 - 255.36 kΩ
|
PIN 1 – PIN 3
|
50.3 - 75.6 kΩ
|
PIN 1 – PIN 2
|
123.36 - 328.56 kΩ
|
| 1. |
Remove the coupling assembly.
(Refer to 4 Wheel Drive (AWD) System - "Coupling Assembly")
| •
|
Keep it level with the sticker (A) on the top of the
coupling.

|
|
|
| 2. |
Remove the pressure sensor (A).
| •
|
Keep going horizontal state to prevent leaks during
remove the pressure sensor.
|
|
|
Tightening torque:
10.8 - 14.7 N.m (1.1 - 1.5 kgf.m, 8.0 - 10.8 lb-ft)
|


|
| 1. |
To install, reverse the removal procedure.
|
| • |
Check the cleanliness of the pressure sensor before installation.
|
| • |
Check the pressure sensor O-ring (A).

|
| • |
Keep it level with the sticker (A) on the top of the coupling.

|
|
Description and operation
Description
The AWD ECM controls the Pump Motor Pump (Actuator) to generating an oil pressure.
The pressure engages a multiple disk clutch to transfer torque to the rear wheels...
Description and operation
Description
When the pressure inside the coupling exceeds the set pressure value, this valve
maintains the pressure under the set value by discharging the partial or whole
amount...
Other information:
Operates as follows when the ignition
switch is in the ON position.
MIST : For a single wiping cycle,
push the lever upward and
release. The wipers will operate
continuously if the lever is
held in this position.
OFF : Wiper is not in operation.
INT : Wiper operates intermittently at
the same wiping intervals...
Description and operation
Description
•
The valve body mounted is inside the transaxle.
•
The valve body is essential to automatic transaxle control and consists
of various valves used to control the oil feed from the oil pump...
Categories
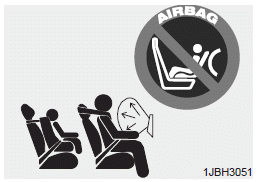
Even though your vehicle is equipped
with the OCS, never install a child
restraint in the front passenger's seat.
An inflating air bag can forcefully
strike a child or child restraint resulting
in serious or fatal injury.
read more


 Oil hydraulic Motor(Actuator)
 Relif Valve