Hyundai Palisade: Air conditioning System / Receiver-Drier
Repair procedures
| SReplacement |
| 1. |
Remove the condenser.
(Refer to A/C System - "Condenser")
|
| 2. |
Remove the cap (B) on the bottom of the condenser with an L wrench (A).
|
| 3. |
Remove the receiver-drier (A) from condenser using a long nose plier.
Check for crumbled receiver-drier and clogged bottom cap filter.
|
| 4. |
Install in the reverse order of removal.
|
 Condenser
C..
 A/C Pressure Transducer
Description and operation
Description
The A/C Pressure Transducer (APT) converts the pressure value of high pressure
line into voltage value after measuring it...
Other information:
Hyundai Palisade (LX2) 2020-2025 Service Manual: Rear Door Inside Handle
Repair procedures Replacement 1. Remove the rear door trim. (Refer to Rear Door - "Rear Door Trim") 2. Loosen the mounting screws and remove the rear door inside handle (A)...
Hyundai Palisade (LX2) 2020-2025 Owner's Manual: Option Menu (Cluster type C)
WARNING While driving, please do not change the setting mode. It may distract your attention and cause the accident. NOTICE Displayed items of user's setting may differ from the content in this owner's manual since the contents vary with the vehicle’s technical specifications...
Categories
- Manuals Home
- 1st Generation Palisade Owners Manual
- 1st Generation Palisade Service Manual
- Wireless Cellular Phone Charging System
- Auto Hold
- Fuse/Relay Panel Description
- New on site
- Most important about car
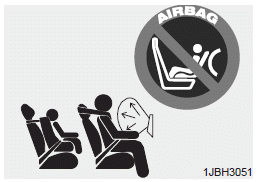
Do Not Install a Child Restraint in the Front Passenger's Seat

Even though your vehicle is equipped with the OCS, never install a child restraint in the front passenger's seat. An inflating air bag can forcefully strike a child or child restraint resulting in serious or fatal injury.
Copyright © 2025 www.hpalisadelx.com


