Hyundai Palisade: Sunroof / Sunroof Glass
Hyundai Palisade (LX2) 2020-2025 Service Manual / Body (Interior and Exterior) / Sunroof / Sunroof Glass
Components and components location
| Components |

| 1. Sunroof glass |
2. Rear sunroof glass |
Repair procedures
| Replacement |
| [Front] |
| 1. |
Slide the mechanism cover (A) in the direction of the arrow to align
it with the groove (B) and remove it.
|
| 2. |
Adjust the height by loosening the screw (A) for adjusting the height
of the glass.
|
| 3. |
Carefully lift up the moving glass (A) and then remove it.
|
| 4. |
Install in the reverse order of removal.
|
| [Rear] |
|
| 1. |
Cut off the sealant on the edge (B) while pulling the piano wire (A)
to the left and right.
|
| 2. |
Cut off the sealant on (A-A), (B-B), (C-C), while pulling a piano wire
(A) to the left and right and remove the sunroof rear glass.
|
| 3. |
Install in the reverse order of removal.
|
 Repair procedures
Adjustment
Inspect Glass Alignment
1.
Inspect the alignment of the front glass weatherstrip (B) and roof panel
(A) and adjust it if needed...
 Sunroof Deflector
Repair procedures
Replacement
1.
Completely open the moving glass using the wide sunroof switch.
2.
Remove the wide sunroof deflector (A) after loosening the mounting screws
located on the front...
Other information:
Hyundai Palisade (LX2) 2020-2025 Service Manual: Automatic Transaxle Fluid (ATF)
Components and components location Components Location 1. ATF Injection plug (Eyebolt) 2. ATF injection plug gasket 3. ATF level check plug 4. ATF level check plug gasket 5. Drain plug gasket 6. Drain plug Repair procedures Automatic Transaxle Fluid (ATF) Level Check • When checking the oil level, be careful not to enter dust, foreign matters, etc...
Hyundai Palisade (LX2) 2020-2025 Owner's Manual: To increase Smart Cruise Control set speed
Follow either of these procedures: Push the toggle switch up (RES+), and release it immediately. The cruising speed will increase by 1 mph (1 km/h) each time you move the toggle switch up in this manner. Push the toggle switch up (RES+), and hold it...
Categories
- Manuals Home
- 1st Generation Palisade Owners Manual
- 1st Generation Palisade Service Manual
- Reverse Parking Aid Function
- Child-Protector Rear Door Locks
- Electrochromatic Mirror (ECM) with homelink system
- New on site
- Most important about car
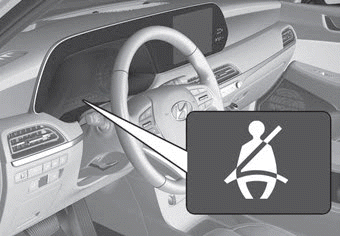
Seat Belt Warning Light
Seat belt warning light

Driver's seat belt warning
As a reminder to the driver, the seat belt warning light will illuminate for approximately 6 seconds each time you place the ignition switch to the ON position regardless of belt fastening. At this time, if the seat belt is not fastened a warning chime will sound for 6 seconds.
Copyright © 2025 www.hpalisadelx.com


