Hyundai Palisade: Fuel Delivery System / Fuel Filter
Repair procedures
| Removal |
| 1. |
Remove the fuel pump.
(Refer to Fuel Delivery System - "Fuel Pump")
|
| 2. |
Disconnect the electric pump wiring connector (A), and the fuel sender
connector (B).
|
| 3. |
Remove the fixing clip (A), and then disconnect the feed tube (B).
|
| 4. |
Remove the head assembly (C) after releasing the cushion fixing clip
(D).
|
| 5. |
Remove the reservoir-cup after releasing the fixing hook (A).
|
| 6. |
Remove the fuel pressure regulator fixing clip (A).
|
| 7. |
Remove the fuel pressure regulator (B) from the fuel filter.
|
| 8. |
Remove the pre-filter (B) after releasing the fixing hooks (A).
|
| 9. |
Remove the fuel pump motor (C).
|
| 10. |
Rmove the fuel filter (D).
|
| Installation |
| 1. |
Install in the reverse order of removal.
|
 Fuel Pressure Sensor (FPS)
Description and operation
Description
The fuel pressure sensor (FPS) is installed on the top of the low pressure fuel
pump and measures the pressure in the low pressure fuel line...
 Fuel Pump Motor
Repair procedures
Removal
1.
Remove the fuel pump.
(Refer to Fuel Delivery System - "Fuel Pump")
2...
Other information:
Hyundai Palisade (LX2) 2020-2025 Owner's Manual: Do Not Install a Child Restraint in the Front Passenger's Seat
Even though your vehicle is equipped with the OCS, never install a child restraint in the front passenger's seat. An inflating air bag can forcefully strike a child or child restraint resulting in serious or fatal injury. WARNING NEVER place a rear-facing or front-facing child restraint in the front passenger's seat of the vehicle...
Hyundai Palisade (LX2) 2020-2025 Owner's Manual: To Activate the ISG System
Prerequisite for activation The ISG system operates in the following situations. - The driver's seatbelt is fastened. - The driver's door and the hood are closed. - The brake vacuum pressure is adequate. - The battery is sufficiently charged. - The outside temperature is between 14 °F and 95 °F (-10 °C and 35 °C)...
Categories
- Manuals Home
- 1st Generation Palisade Owners Manual
- 1st Generation Palisade Service Manual
- AWD Operation
- Wireless Cellular Phone Charging System
- Auto Hold
- New on site
- Most important about car
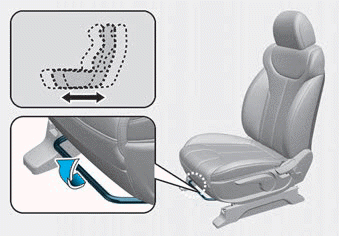
Manual adjustment
The front seat can be adjusted by using the levers located on the outside of the seat cushion. Before driving, adjust the seat to the proper position so that you can easily control the steering wheel, foot pedals and controls on the instrument panel.

Copyright © 2025 www.hpalisadelx.com


