Hyundai Palisade: AVN System / Speakers
Repair procedures
| Inspection |
| 1. |
Troubleshooting for Speaker
|


| Removal |
Front Door Speaker
| 1. |
Remove the front door trim.
(Refer to Body - "Front Door Trim")
|
| 2. |
Disconnect the speaker connector (A) and then remove the front door
speaker (B) after loosening mounting screws.
|

Rear Door Speaker
| 1. |
Remove the rear door trim.
(Refer to Body - "Rear Door Trim")
|
| 2. |
Disconnect the speaker connector (A) and then remove the front door
speaker (B) after loosening mounting screws.
|

Front center speaker
| 1. |
Remove the center speaker grill (A) and then disconnect the speaker
connector (B).
|

| 2. |
Remove the center speaker (A) after loosening mounting screws.
|

| 3. |
Disconnect the speaker connector (A) and then remove the center speaker
(B).
|

Front Tweeter Speaker
| 1. |
Remove the front quadrant cover (A).
|

| 2. |
Remove the speaker (A) after loosening mounting screws.
|

Rear Tweeter Speakers
| 1. |
Remove the rear door trim.
(Refer to Body - "Rear Door Trim")
|
| 2. |
Disconnect the speaker connector and then remove the center speaker
(A).
|

Woofer Speaker
| 1. |
Remove the rear side luggage trim LH.
(Refer to Body - "Luggage Side Trim")
|
| 2. |
Disconnect the woofer speaker connector (A).
|
| 3. |
Remove the woofer speaker (B) after loosening mounting screws.
|

Surround Speaker
| 1. |
Remove the rear pillar trim.
(Refer to Body - "Rear Pillar Trim")
|
| 2. |
Disconnect the speaker connector(A) and then remove the surround speaker
(B).
|

| Installation |
Front Door Speaker
| 1. |
Install the front speaker.
|
| 2. |
Install the front door trim.
|
Rear Door Speaker
| 1. |
Install the rear speaker.
|
| 2. |
Install the rear door trim.
|
Front Center Speaker
| 1. |
Install the front center speaker.
|
| 2. |
Install the front center speaker grill.
|
Front Tweeter Speaker
| 1. |
Connect the connector.
|
| 2. |
Install the tweeter speaker and front door quadrant cover.
|
Rear Tweeter Speaker
| 1. |
Connect the connector.
|
| 2. |
Install the tweeter speaker and rear door quadrant cover.
|
Woofer Speaker
| 1. |
Install the woofer speaker.
|
| 2. |
Install the left luggage side trim.
|
Surround Speaker
| 1. |
Install the surround speaker.
|
| 2. |
Install the rear pillar trim.
|
 AVN Head Unit
Components and components location
Components
Connector Pin Information
No
Connector A
(ExternalAmplifier)
Connector A
(Internal Amplifier)
Connector B
Connector C
1
-
Rear door speaker LH (+)
-
-
2
-
Rear door speaker LH (-)
Mic (+)
I_CAN (High)
3
Navigation voice (+)
-
-
-
4
External amplifier SPDIF (+)
-
-
-
5
Reset
Reset
Antenna dummy power
-
6
RVM : Camera Power , SVM : -
RVM : Camera Power , SVM : -
Illumination (+)
-
7
RVM : Camera Video , SVM : -
RVM : Camera Video , SVM : -
M-CAN (High)
-
8
-
-
-
-
9
-
-
-
-
10
-
-
Battery (+)
-
11
AUX DETECT
AUX DETECT
Battery (+)
-
12
Steering wheel remote
Steering wheel remote
Ground
-
13
-
Front door speaker LH (+)
Ground
-
14
-
Front door speaker LH (-)
-
-
15
-
Front door speaker RH (-)
Mic (-)
-
16
-
Front door speaker RH (+)
- (SVM type:SVM Detect2)
MTS Key
17
Navigation voice (-)
-
-
-
18
External amplifier SPDIF (-)
-
-
-
19
External amplifier SPDIF (Ground)
-
Illumination (-)
-
20
RVM : Camera Power GND , SVM : -
RVM : Camera Power GND , SVM : -
M-CAN (Low)
-
21
RVM : Camera Video GND , SVM : -
RVM : Camera Video GND , SVM : -
-
-
22
-
-
ACC
23
-
-
Keyboard Power
24
-
-
-
25
-
-
-
26
Steering wheel remote ground
Steering wheel remote ground
-
27
-
Rear door speaker RH (-)
-
28
-
Rear door speaker RH (+)
-
29
-
-
-
30
-
-
-
31
-
-
-
32
SVM DETECT 1
SVM DETECT 1
-
33
RVM : Camera Shield GND , SVM : -
RVM : Camera Shield GND , SVM : -
IGN 1
34
-
-
Keyboard GND
35
-
-
-
36
-
-
37
-
-
38
Vehicle speed
Vehicle speed
Repair procedures
Removal
1...
 External Amplifier
Components and components location
Components
Connector Pin Information
No
Connector A
Connector B
1
Battery (+)
Rear left door speaker (+)
2
Battery (+)
Rear left door speaker (-)
3
Battery (+)
Rear right door speaker (+)
4
Battery (+)
Rear right door speaker (-)
5
-
-
6
M-CAN (High)
-
7
M-CAN (Low)
-
8
ACC
-
9
Navigation voice (+)
-
10
-
-
11
-
-
12
Front left door speaker (+)
-
13
Front left door speaker (-)
Surround left speaker (+)
14
Front right door speaker (+)
Surround left speaker (-)
15
Front right door speaker (-)
Surround right speaker (+)
16
Ground
Surround right speaker (-)
17
Ground
Sub woofer speaker1 (+)
18
Ground
Sub woofer speaker1 (-)
19
Ground
Sub woofer speaker2 (+)
20
SPDIF (+)
Sub woofer speaker2 (-)
21
SPDIF (-)
-
22
SPDIF ground
-
23
Navigation voice (-)
-
24
IGN 1
25
Front left tweeter speaker (+)
-
26
Front left tweeter speaker (-)
-
27
Front right tweeter speaker (+)
Center speaker (+)
28
Front right tweeter speaker (-)
Center speake (-)
Repair procedures
Removal
External Amplifier
1...
Other information:
Hyundai Palisade (LX2) 2020-2025 Service Manual: Front Mud Guard
Repair procedures Replacement • When removing with a flat-tip screwdriver or remover, wrap protective tape around the tools to prevent damage to components...
Hyundai Palisade (LX2) 2020-2025 Service Manual: Cluster Fascia Panel
Components and components location Component Location 1. Cluster fascia panel Repair procedures Replacement • When removing with a flat-tip screwdriver or remover, wrap protective tape around the tools to prevent damage to components...
Categories
- Manuals Home
- 1st Generation Palisade Owners Manual
- 1st Generation Palisade Service Manual
- Side view mirror adjustment, Folding the side view mirrors
- Normal Maintenance Schedule (3.8 GDI)
- Auto Hold
- New on site
- Most important about car
Do Not Install a Child Restraint in the Front Passenger's Seat
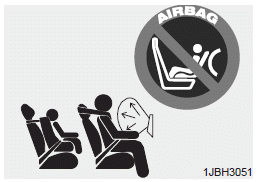
Even though your vehicle is equipped with the OCS, never install a child restraint in the front passenger's seat. An inflating air bag can forcefully strike a child or child restraint resulting in serious or fatal injury.

Copyright © 2025 www.hpalisadelx.com