Hyundai Palisade: Brake System / Brake Pad
Repair procedures
| Replacement |
|
Front Brake Pad
| 1. |
Loosen the wheel nuts slightly.
Raise the vehicle, and make sure it is securely supported.
|
| 2. |
Remove the front wheel and tire (A) from front hub.
|
| 3. |
Up the brake caliper body (A) by loosening the guided rod bolt.
|
| 4. |
Remove the brake pad (A).
|
| 5. |
Replace the pad retainer (A) with a new one.
|
| 6. |
Replace the brake pad (A) with a new one.
|
| 7. |
Use a SST (09581-11000) when installing the brake caliper assembly.
|
| 8. |
Install the caliper body (A) then tighten the guide rod bolt.
|
| 9. |
Install the front wheel and tire (A).
|
Rear Brake Pad
| 1. |
Before removing the rear caliper, perform "Brake Pad Replacement Mode" using
the GDS.
|
| 2. |
Select C2 (Release) on the screen below.
|
| 3. |
Loosen the wheel nuts slightly.
Raise the vehicle, and make sure it is securely supported.
|
| 4. |
Remove the rear wheel and tire (A) from the rear hub.
|
| 5. |
Disconnect the EPB actuator connector (A).
|
| 6. |
Remove the caliper body (A) after loosening the guide rod bolt.
|
| 7. |
Remove the pad return spring (A).
|
| 8. |
Remove the brake pad (A).
|
| 9. |
Replace the pad retainer (A) with a new one.
|
| 10. |
Replace the brake pad (A) with a new one.
|
| 11. |
Install the pad return spring (A).
|
| 12. |
Rotate the caliper piston and push the direction of the arrow.
|
| 13. |
Install the caliper body (A) then tighten the guide rod bolt.
|
| 14. |
Install the rear wheel and tire (A).
|
| 15. |
After replacing the brake pad (EPB applied), perform "Brake Pad Replacement
Mode" using the GDS.
|
| 16. |
Select C1 (Apply) on the screen below.
|
| 17. |
After replacing the brake pad, make sure that the caliper is installed
correctly by performing "Check assembling (ECU replaced)" from the optional
function.
|
| Inspection |
Front Brake Pad Check
| 1. |
Check the pad wear. Measure the pad thickness and replace it, if it
is less than the specified value.
|
| 2. |
Check that grease is applied, to sliding contact points and the pad
and backing metal for damage.
|
Rear Brake Pad Check
| 1. |
Check the pad wear. Measure the pad thickness and replace it, if it
is less than the specified value.
|
| 2. |
Check the damage of pad, backing metal and contamination with grease.
|
 Rear Disc Brake
Components and components location
Components
1. EPB actuator
2. Caliper body
3. Guide rod pin
4. Guide rod boot
5...
 Stop Lamp Switch
Components and components location
Components
1. Brake member assembly
2. Stop lamp switch
3. Brake pedal arm assembly
4...
Other information:
Hyundai Palisade (LX2) 2020-2025 Service Manual: Parking/View Switch
Repair procedures Removal 1. Disconnect the negative (-) battery terminal. 2. Remove the floor console upper cover. (Refer to Body - "Floor Console Assembly") 3...
Hyundai Palisade (LX2) 2020-2025 Owner's Manual: Resetting the rear sunshade
The rear sunshade may need to be reset if the following conditions occur: - Battery is discharged or disconnected or the related fuse has been replaced or disconnected - The rear sunshade does not normally operate To reset the rear sunshade, perform the following steps: 1...
Categories
- Manuals Home
- 1st Generation Palisade Owners Manual
- 1st Generation Palisade Service Manual
- Side view mirror adjustment, Folding the side view mirrors
- Emergency liftgate safety release
- Auto Hold
- New on site
- Most important about car
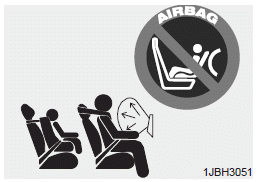
Do Not Install a Child Restraint in the Front Passenger's Seat

Even though your vehicle is equipped with the OCS, never install a child restraint in the front passenger's seat. An inflating air bag can forcefully strike a child or child restraint resulting in serious or fatal injury.
Copyright © 2025 www.hpalisadelx.com


